> ## Documentation Index
> Fetch the complete documentation index at: https://docs.pingtree.com/llms.txt
> Use this file to discover all available pages before exploring further.
# Create a Campaign
> Step-by-step guide to creating a new campaign in Pingtree, from naming to initial configuration.
## Overview
Creating a campaign in Pingtree takes just a few minutes. Once created, your campaign gets a unique **Campaign ID (CID)** — such as `cp100` — that identifies it across the entire platform. After creation, you can layer in sources, distribution, funnels, and settings at your own pace.
> **Video Walkthrough:** A step-by-step video guide for this feature is coming soon.
 ***
## Before You Start
Have the following ready before creating your campaign:
* A clear campaign name (e.g., "Auto Insurance — Q3 2025").
* An understanding of what lead type you're running (form lead, click, ping-post).
* Optionally, a campaign category if you're organizing by vertical or brand.
***
## Steps to Create a Campaign
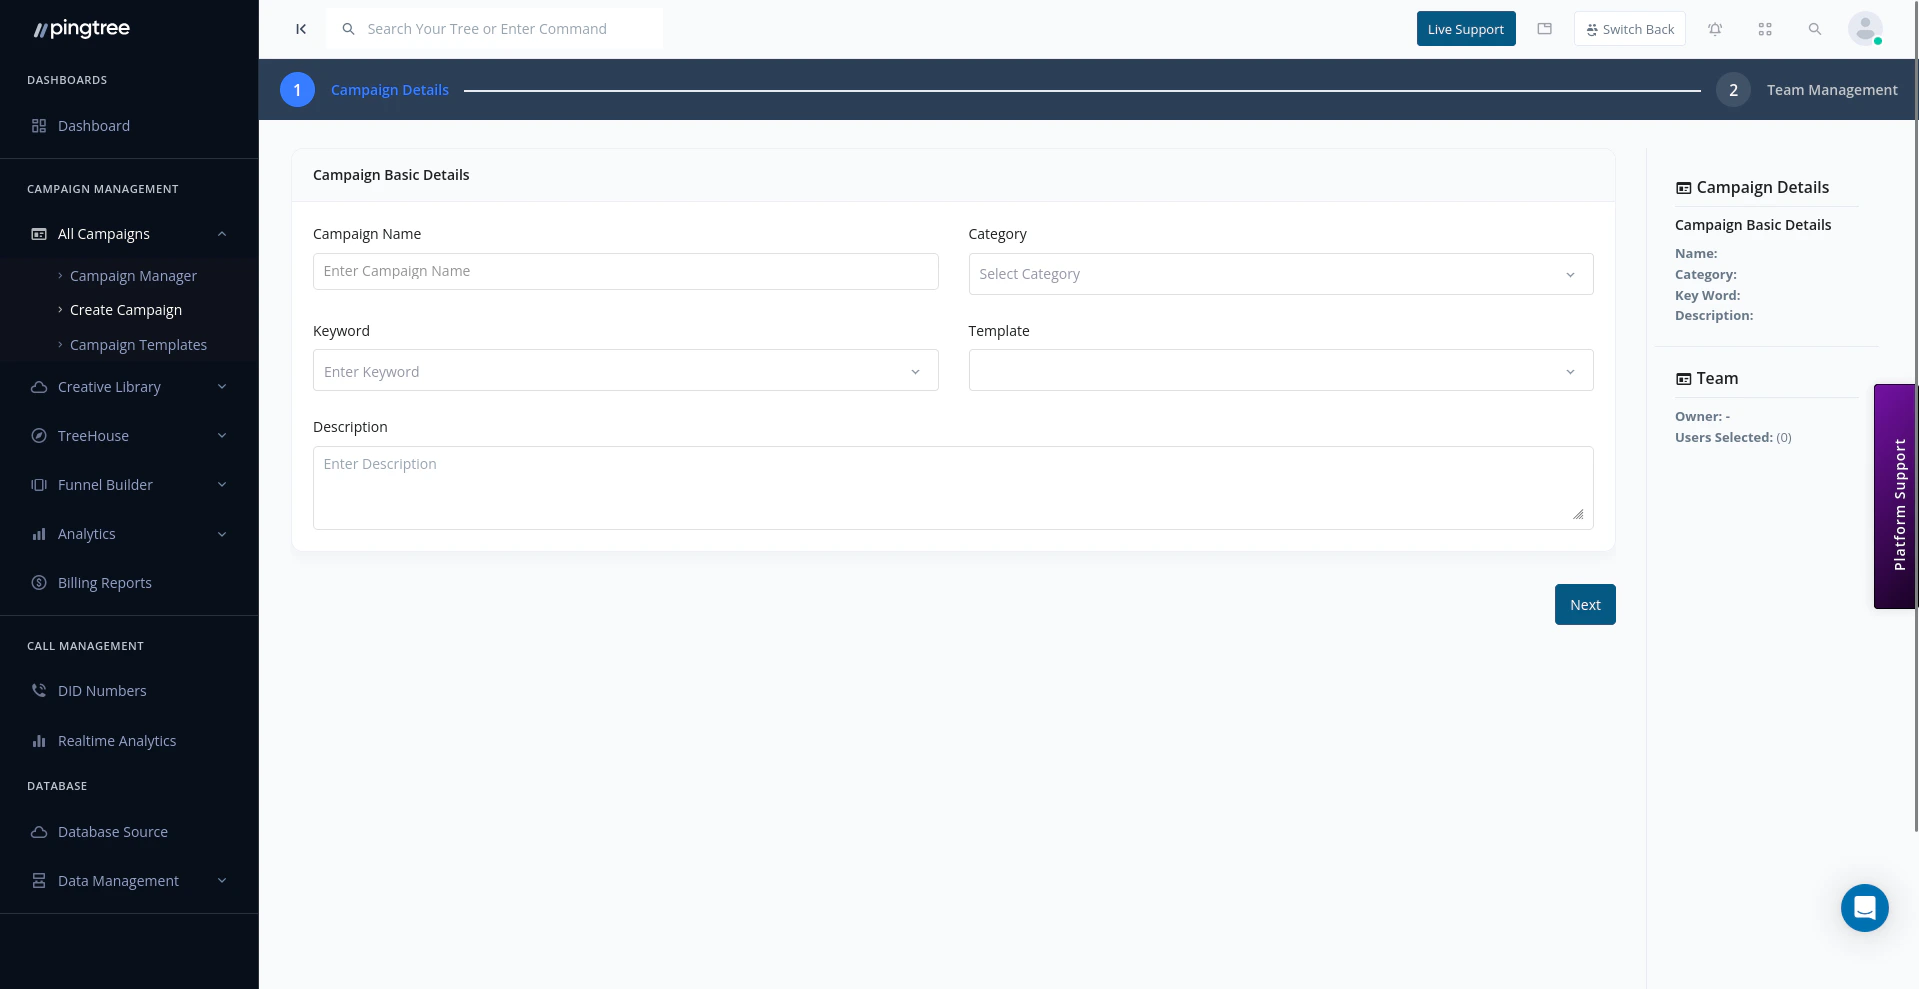
From the **Campaign Manager** page, click the **Create Campaign** button in the top-right corner. You can also find this option in the sidebar navigation.
Give your campaign a clear, descriptive name. Add an optional description to note the goals, vertical, or any relevant context for your team.
Assign the campaign to an existing category (e.g., "Insurance", "Solar", "Finance") to keep your list organized. You can create a new category directly from this dropdown if needed.
Select the type of lead generation your campaign will use:
| Type | Description |
| ------------- | -------------------------------------------- |
| **Form Lead** | Leads are submitted via a web form |
| **Click** | Traffic is redirected to an offer or listing |
| **Ping-Post** | Leads are auctioned to buyers in real time |
Set foundational options for the campaign:
* **Timezone** — Choose the timezone used for reporting and scheduling (e.g., US/Eastern).
* **Dedupe Rules** — Define how duplicate leads are detected and handled (e.g., deduplicate by email within 30 days).
A database source stores all lead data collected by this campaign. You can create a new database source or link the campaign to an existing one. This step can also be completed after campaign creation.
Add brand assets to personalize the campaign experience:
* **Logo** — Displayed on funnel pages and source portals.
* **Hero Image** — Used as the main visual on landing pages.
* **Landing URL** — The primary destination URL for this campaign's traffic.
> **Tip:** Brand settings are especially useful if you manage multiple brands within one Pingtree account, as they keep your partner-facing pages consistent.
Click **Create Campaign** to finalize. Pingtree will generate a unique **Campaign ID (CID)** for this campaign — for example, `cp100`. This ID is used across tracking links, API calls, and reports.
***
## What Happens After Creation
Once your campaign is created, you'll land on the **Campaign Overview** page. From here you can configure:
| Section | What to Set Up |
| ------------------ | --------------------------------------------------------- |
| **Sources** | Add custom sources, marketing partners, or media channels |
| **Distribution** | Configure endpoints, routing rules, and ping-post buyers |
| **Funnel Builder** | Build landing pages and form flows |
| **Settings** | Fine-tune campaign behavior, compliance, and API keys |
> **Tip:** You don't need to configure everything before going live. A campaign with a source and a distribution endpoint is enough to start receiving and routing leads.
***
## Campaign ID Format
Every campaign is automatically assigned a unique Campaign ID when created. This ID follows the format:
```
cpXXX
```
Examples: `cp100`, `cp101`, `cp205`
This ID is used in:
* API calls to submit or retrieve leads
* Tracking links for source attribution
* Reports and logs to identify which campaign a lead belongs to
***
## Before You Start
Have the following ready before creating your campaign:
* A clear campaign name (e.g., "Auto Insurance — Q3 2025").
* An understanding of what lead type you're running (form lead, click, ping-post).
* Optionally, a campaign category if you're organizing by vertical or brand.
***
## Steps to Create a Campaign
From the **Campaign Manager** page, click the **Create Campaign** button in the top-right corner. You can also find this option in the sidebar navigation.
Give your campaign a clear, descriptive name. Add an optional description to note the goals, vertical, or any relevant context for your team.
Assign the campaign to an existing category (e.g., "Insurance", "Solar", "Finance") to keep your list organized. You can create a new category directly from this dropdown if needed.
Select the type of lead generation your campaign will use:
| Type | Description |
| ------------- | -------------------------------------------- |
| **Form Lead** | Leads are submitted via a web form |
| **Click** | Traffic is redirected to an offer or listing |
| **Ping-Post** | Leads are auctioned to buyers in real time |
Set foundational options for the campaign:
* **Timezone** — Choose the timezone used for reporting and scheduling (e.g., US/Eastern).
* **Dedupe Rules** — Define how duplicate leads are detected and handled (e.g., deduplicate by email within 30 days).
A database source stores all lead data collected by this campaign. You can create a new database source or link the campaign to an existing one. This step can also be completed after campaign creation.
Add brand assets to personalize the campaign experience:
* **Logo** — Displayed on funnel pages and source portals.
* **Hero Image** — Used as the main visual on landing pages.
* **Landing URL** — The primary destination URL for this campaign's traffic.
> **Tip:** Brand settings are especially useful if you manage multiple brands within one Pingtree account, as they keep your partner-facing pages consistent.
Click **Create Campaign** to finalize. Pingtree will generate a unique **Campaign ID (CID)** for this campaign — for example, `cp100`. This ID is used across tracking links, API calls, and reports.
***
## What Happens After Creation
Once your campaign is created, you'll land on the **Campaign Overview** page. From here you can configure:
| Section | What to Set Up |
| ------------------ | --------------------------------------------------------- |
| **Sources** | Add custom sources, marketing partners, or media channels |
| **Distribution** | Configure endpoints, routing rules, and ping-post buyers |
| **Funnel Builder** | Build landing pages and form flows |
| **Settings** | Fine-tune campaign behavior, compliance, and API keys |
> **Tip:** You don't need to configure everything before going live. A campaign with a source and a distribution endpoint is enough to start receiving and routing leads.
***
## Campaign ID Format
Every campaign is automatically assigned a unique Campaign ID when created. This ID follows the format:
```
cpXXX
```
Examples: `cp100`, `cp101`, `cp205`
This ID is used in:
* API calls to submit or retrieve leads
* Tracking links for source attribution
* Reports and logs to identify which campaign a lead belongs to