Overview
The Manage Campaigns page is your central hub for all campaigns in your Pingtree organization. From here you can search, filter, and take actions on any campaign without needing to open it individually.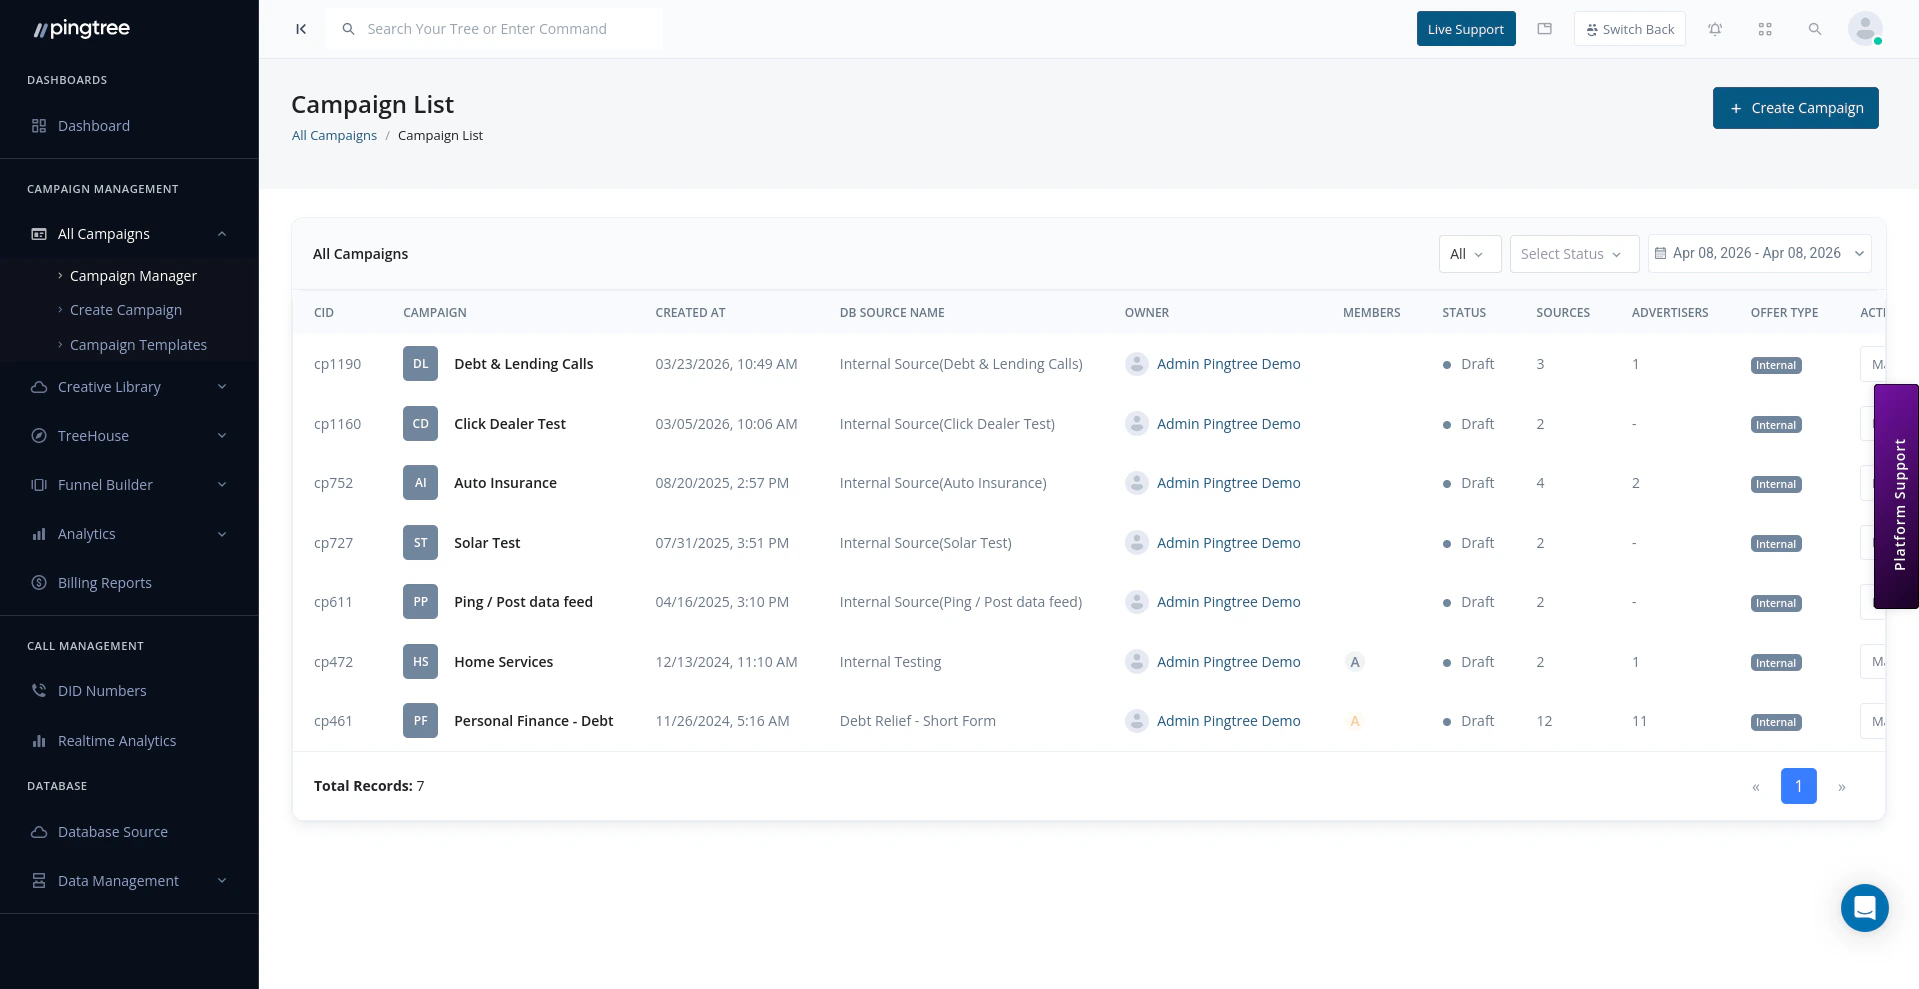
Campaign list view with search filters and action menu
Campaign List Table
Each row in the table represents a single campaign. The following columns are shown by default:Searching and Filtering
Use the toolbar at the top of the list to narrow down campaigns:- Search bar — Search by campaign name or Campaign ID.
- Campaign Type filter — Filter by lead generation type (e.g., form, click, ping-post).
- Status filter — Show only Active or Inactive campaigns.
- Date Range filter — Filter campaigns by their creation date.
- Category filter — Show campaigns belonging to a specific category.
Tip: Combining filters is a fast way to find campaigns in large organizations. For example, filter by Status = Active and Category = “Insurance” to see all live insurance campaigns at once.
Campaign Actions
Each row in the table has an actions menu (accessible via the three-dot icon or inline buttons). Available actions include:Campaign Categories
Categories help you organize campaigns by vertical, brand, or any grouping that makes sense for your team.- Categories can be created from the campaign list page or within campaign settings.
- A campaign can belong to one category at a time.
- Filter the list by category to quickly surface related campaigns.
Transferring Campaign Ownership
If a campaign manager leaves the team or responsibilities shift, you can transfer ownership to another user.- Open the actions menu for the campaign.
- Select Transfer Ownership.
- Choose the new owner from the user list.
- Confirm the transfer.
Note: Only admins and the current campaign owner can initiate an ownership transfer.
Adding Team Members to a Campaign
Campaign access can be scoped to specific users, so only the right people see the right campaigns.- Open the actions menu for the campaign.
- Select Manage Team.
- Search for the user you want to add.
- Select their role level and confirm.
Campaign Status
Toggle status from the actions menu at any time. Changes take effect immediately.