How It Works
-
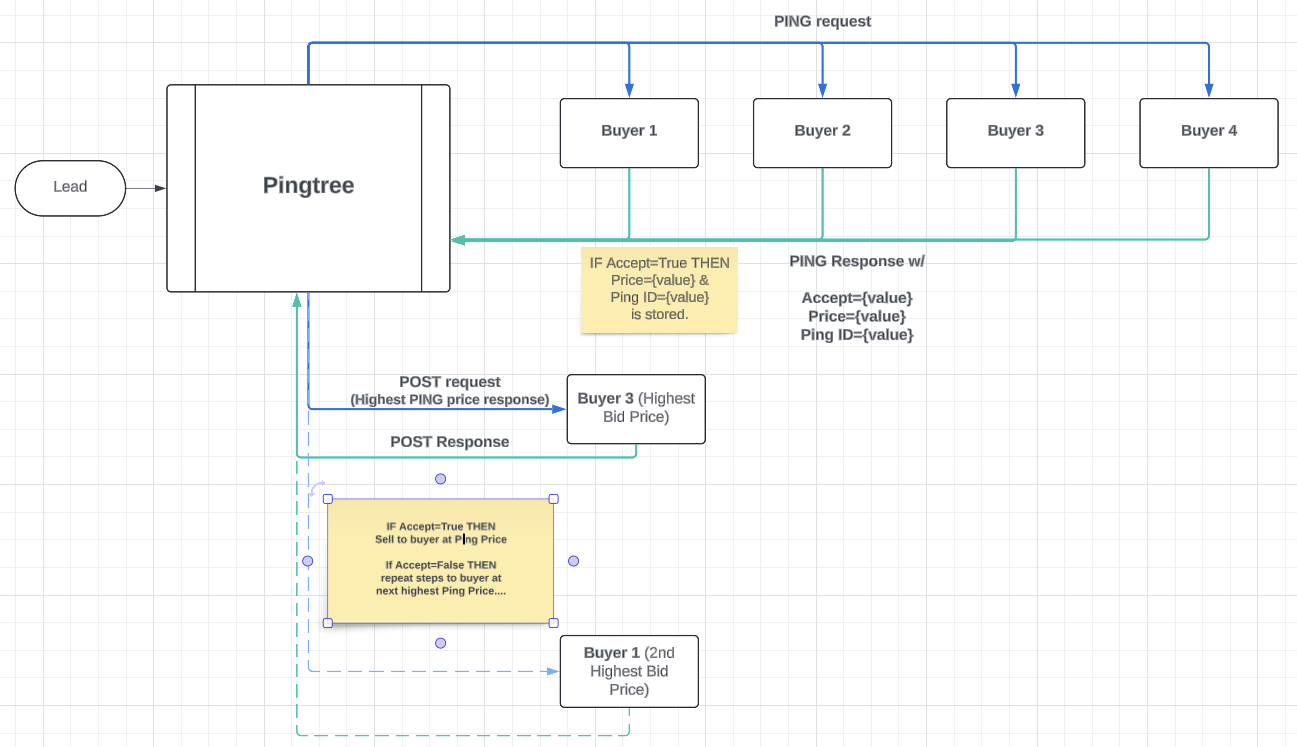
Lead Submission
A visitor submits a form. Pingtree receives the full lead payload. -
Ping to Buyers
Pingtree sends a Ping request (HTTP GET or POST) to all eligible buyer endpoints simultaneously. This request includes partial lead data (e.g., zip code, age, product interest) based on mapping. -
Buyers Evaluate & Respond
Each buyer evaluates the lead and returns a Ping response with:- Accept/Reject status
- Bid amount (price they’re willing to pay)
- A unique Ping ID token (required for Post)
-
Select Highest Bidder
Pingtree sorts all accepted responses by bid value. The buyer with the highest bid is selected. -
Post to Winning Buyer
Pingtree sends a Post request (with full lead data and Ping ID) to the winning buyer. If accepted, the lead is sold. If rejected, Pingtree retries posting with the next highest bidder. -
Fallback Handling
If all posts fail, the lead is marked as unsold.
Buyer Posting Specs
When integrating with a Ping+Post buyer, their API documentation should clarify:- Ping Endpoint URL & required fields
- Post Endpoint URL & full data field set
- Authentication headers or static tokens
- Distinction between Ping and Post requests
- Expected Ping ID/token requirements
Configuration & Setup
Follow these steps to configure a Ping+Post integration:1
Enable Ping+Post Routing
In the advertiser or custom endpoint’s Lead Routing section, enable Ping+Post Routing and switch to the PING tab.
2
Map Ping Request Fields
• Input the Ping URL and method (GET or POST)
• Map the necessary partial lead fields
• Enable “Bypass Ping” if this buyer should only be used for direct Post scenarios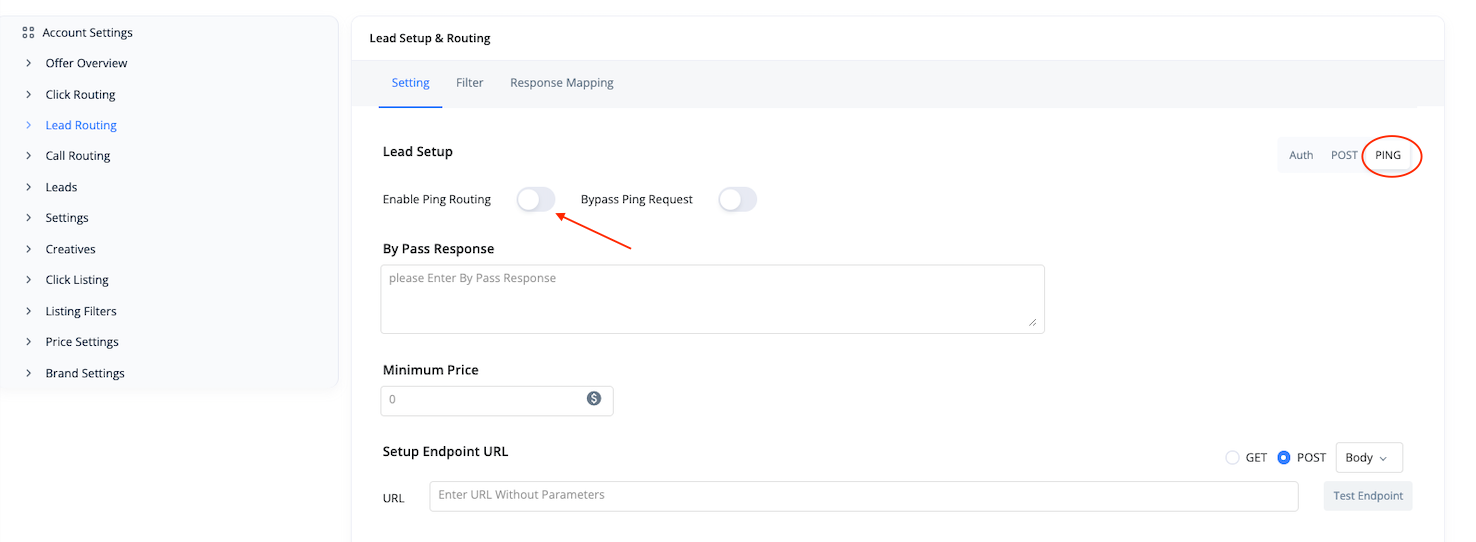
• Map the necessary partial lead fields
• Enable “Bypass Ping” if this buyer should only be used for direct Post scenarios
3
Configure Ping Response Mapping
• Set Ping Timeout (max wait time per buyer)
• Map Ping ID, Accept/Reject flag, and Bid Amount
• Optionally map Reject Reason and other logging fields
• Use “Store Fields From Buyer Response” to auto-populate lead fields based on buyer data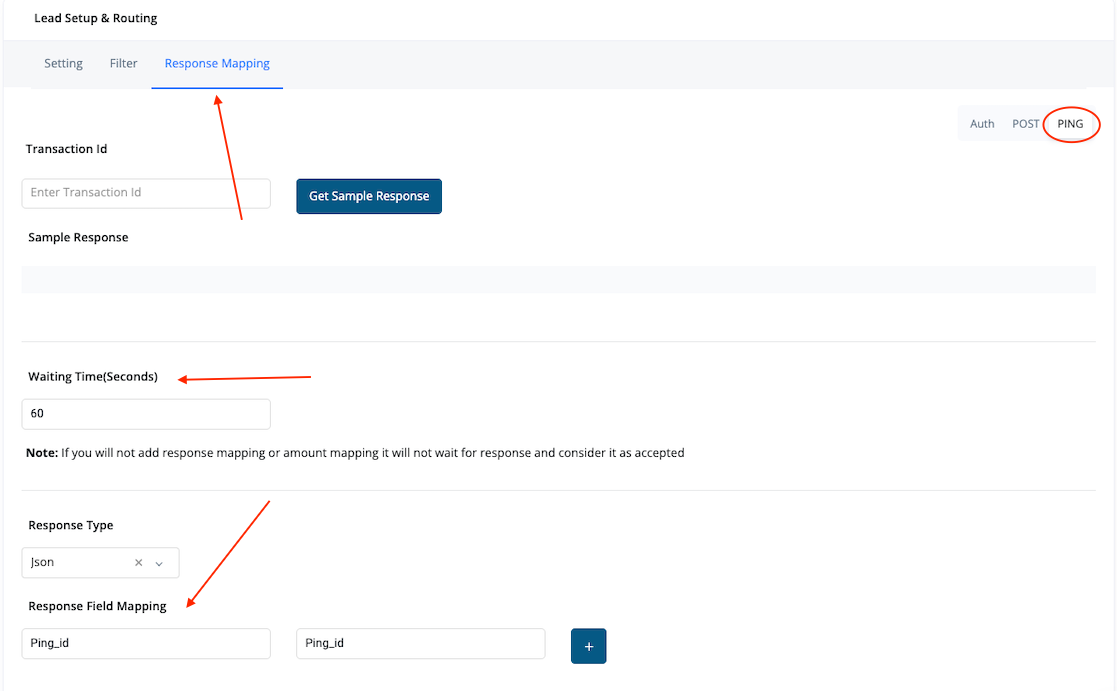
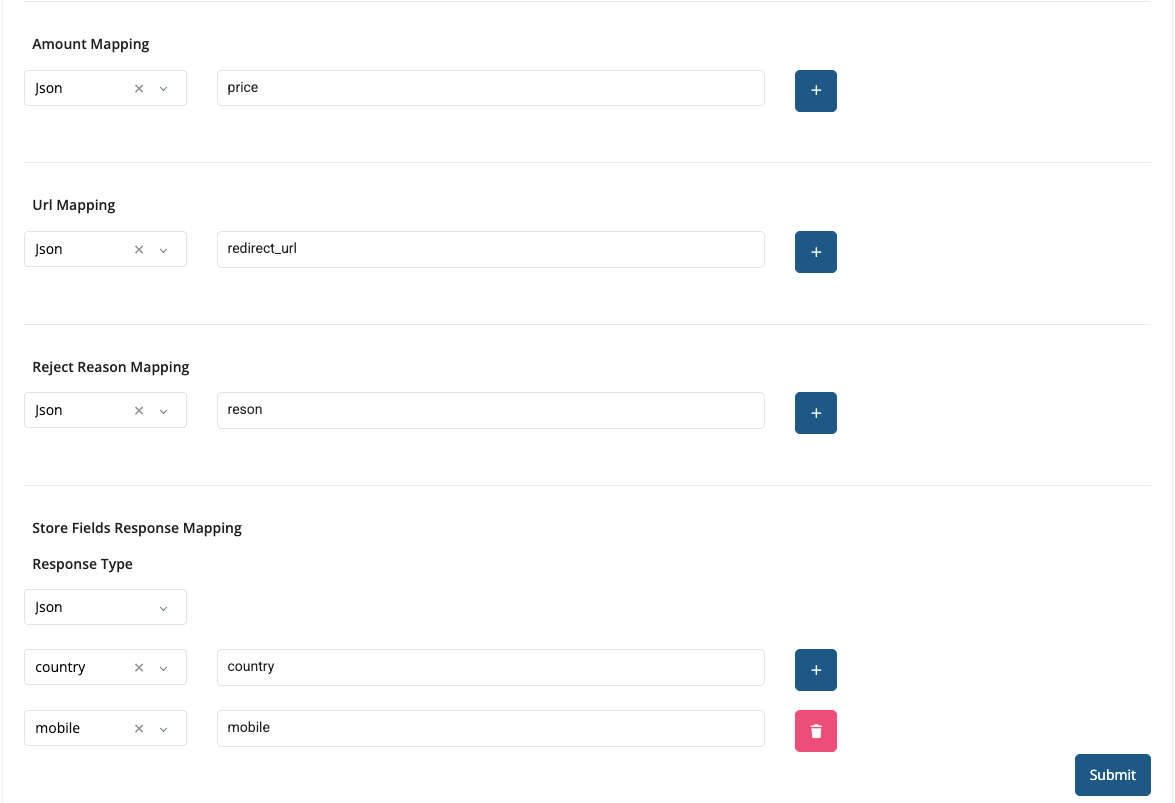
• Map Ping ID, Accept/Reject flag, and Bid Amount
• Optionally map Reject Reason and other logging fields
• Use “Store Fields From Buyer Response” to auto-populate lead fields based on buyer data
4
Map Post Request Fields
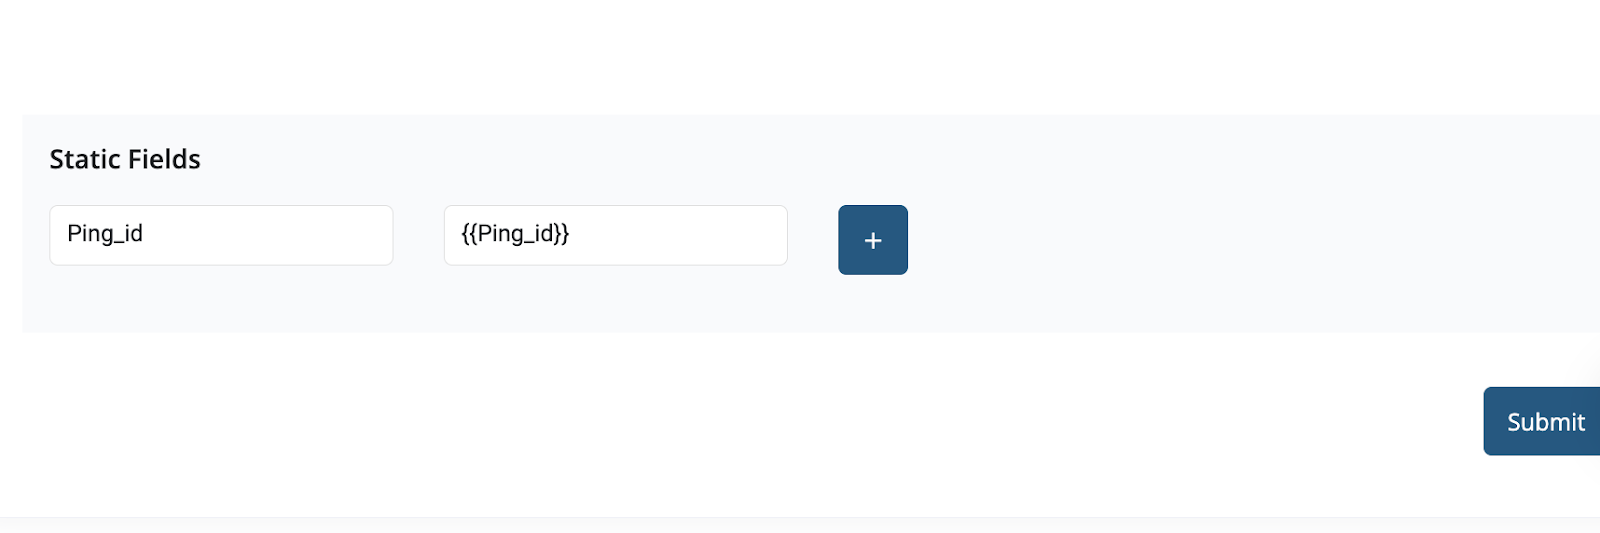
• Switch to the POST tab
• Enter the Post endpoint and map full lead fields
• Use
• Map response logic to confirm lead acceptance or rejection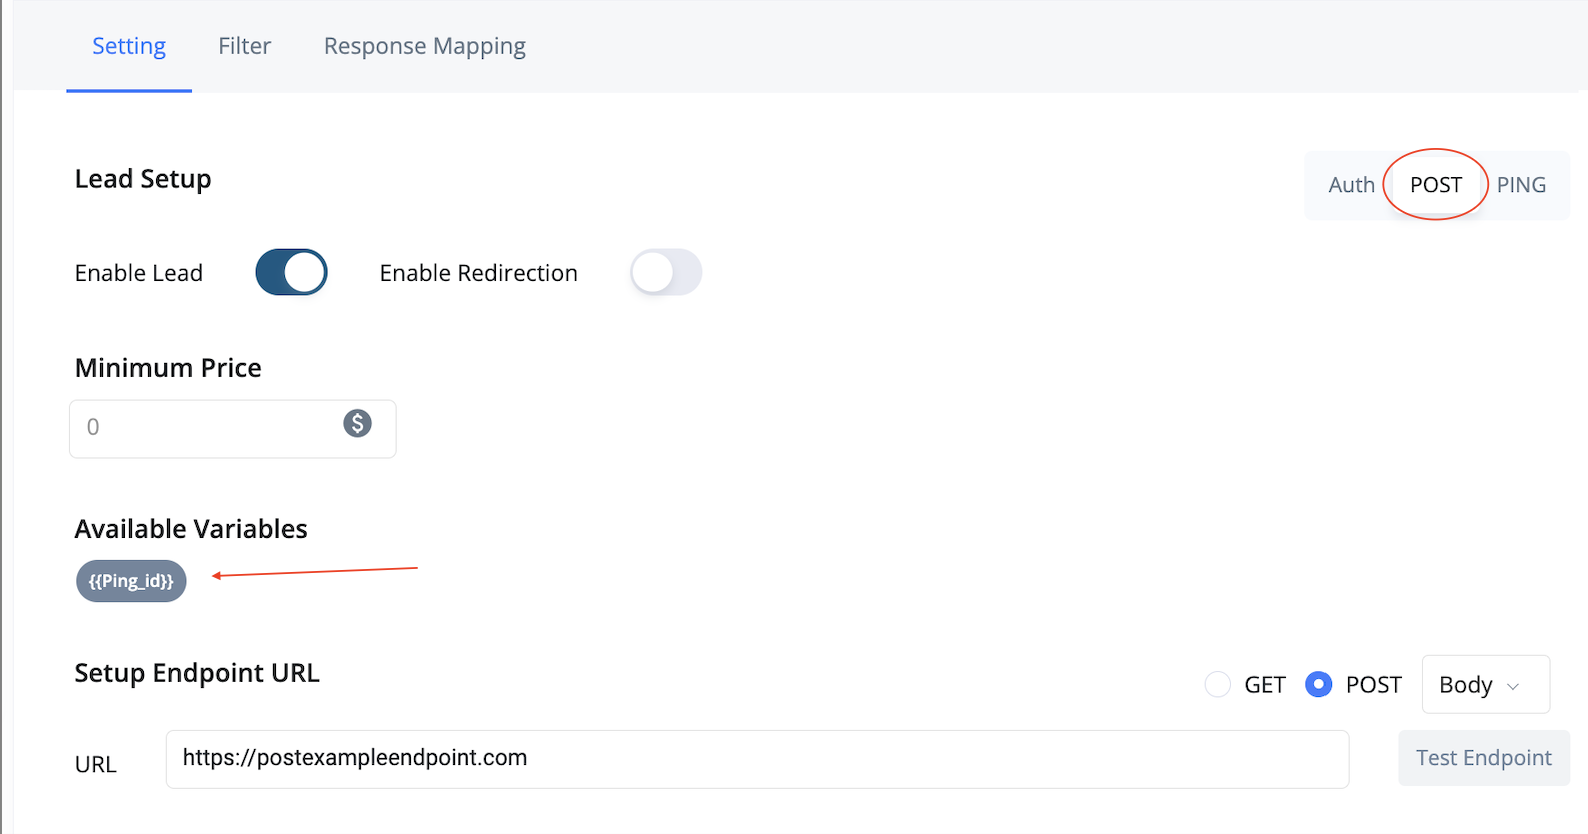
• Enter the Post endpoint and map full lead fields
• Use
{{ping_id}} or other stored response values in static fields as required by the buyer• Map response logic to confirm lead acceptance or rejection
5
Test & Validate
• Use “Test Endpoint” to send sample Ping/Post requests
• Use “Get Sample Response” with a valid
• Confirm bid handling, Ping ID tracking, and endpoint response structure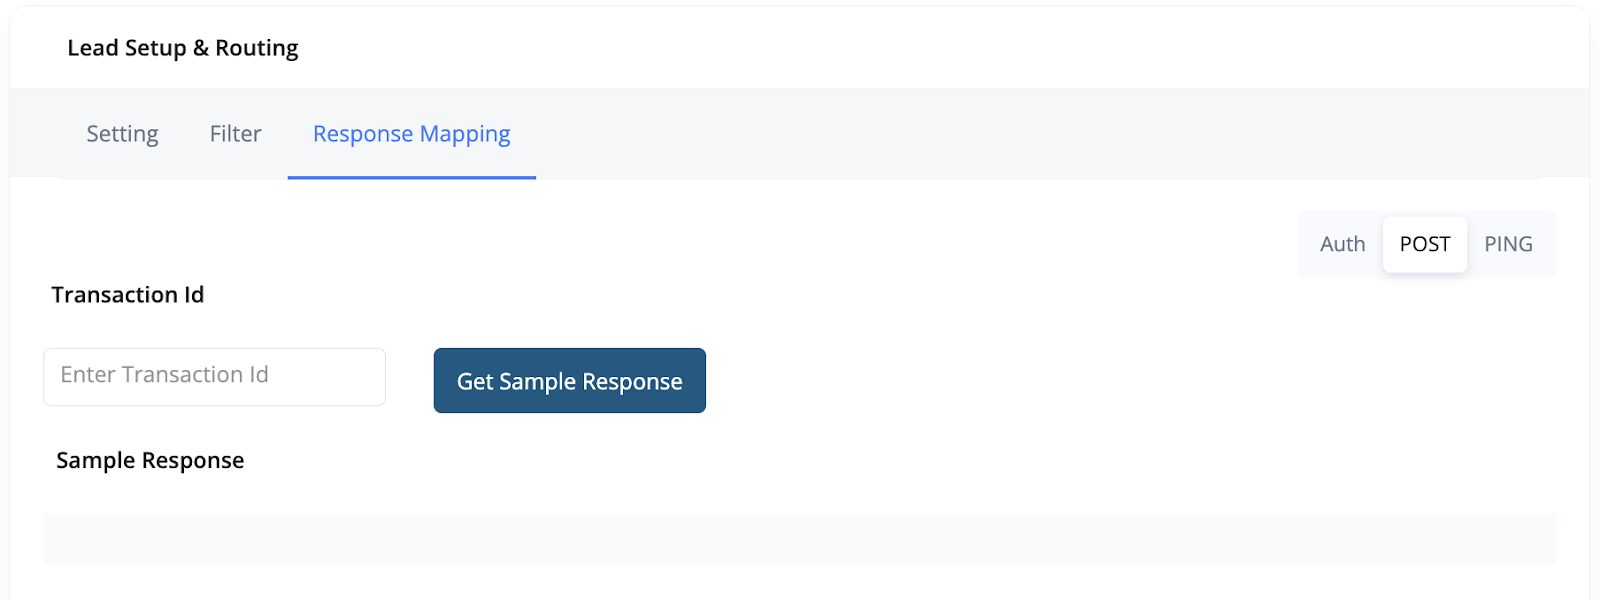
• Use “Get Sample Response” with a valid
transaction_id to test mapping• Confirm bid handling, Ping ID tracking, and endpoint response structure
Routing Logic Setup
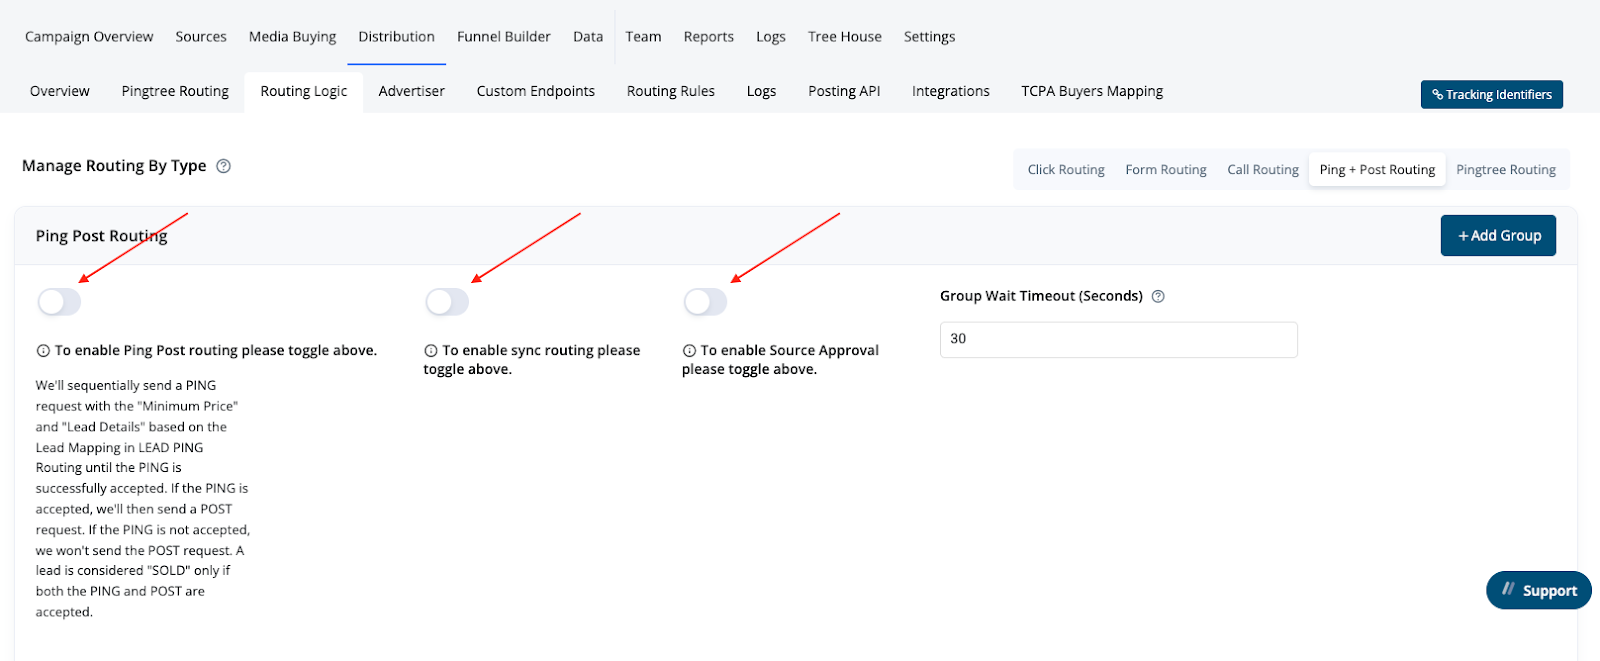
- Enable Ping+Post Routing: Activates Ping+Post logic, overriding default routing.
- Async Toggle: Sends Ping requests to all buyers at once, waits for responses, and picks the highest bidder (recommended).
- Sync Flow: Sends Ping requests sequentially. Stops at first qualified bid that meets minimum price and proceeds to Post.
- Group Wait Time: In Async, sets how long Pingtree waits for all buyers in a group to respond.
- Add Groups: Organize buyers into tiers or categories. If all buyers in one group fail, Pingtree moves to the next group.
- Source Approval Flow: If enabled, Pingtree returns the bid to the source via API. The source then triggers the Post using the Lead ID.
Revenue Attribution
Revenue is captured from the Bid Amount returned in the Ping response. Even if a buyer also returns a value in the Post, Pingtree prioritizes the Ping value for billing and reporting.Example: Ping+Post Lifecycle Summary
- A form submission generates a lead.
- Pingtree sends Pings to five buyers.
- Three buyers respond:
- Buyer A: Accept - $45, Ping ID: abc123
- Buyer B: Reject
- Buyer C: Accept - $42, Ping ID: xyz789
- Buyer A wins (highest bid).
- Pingtree posts the full lead +
abc123Ping ID to Buyer A. - Buyer A accepts → lead is sold, revenue = $45.
Best Practices
- Validate mappings using the “Get Sample Response” tester.
- Always verify Ping ID logic with the buyer’s dev team.
- Use Async routing to increase chances of highest bid.
- Store buyer responses when possible for debugging or redirection needs.
- Separate Ping and Post logic clearly in documentation and configs.