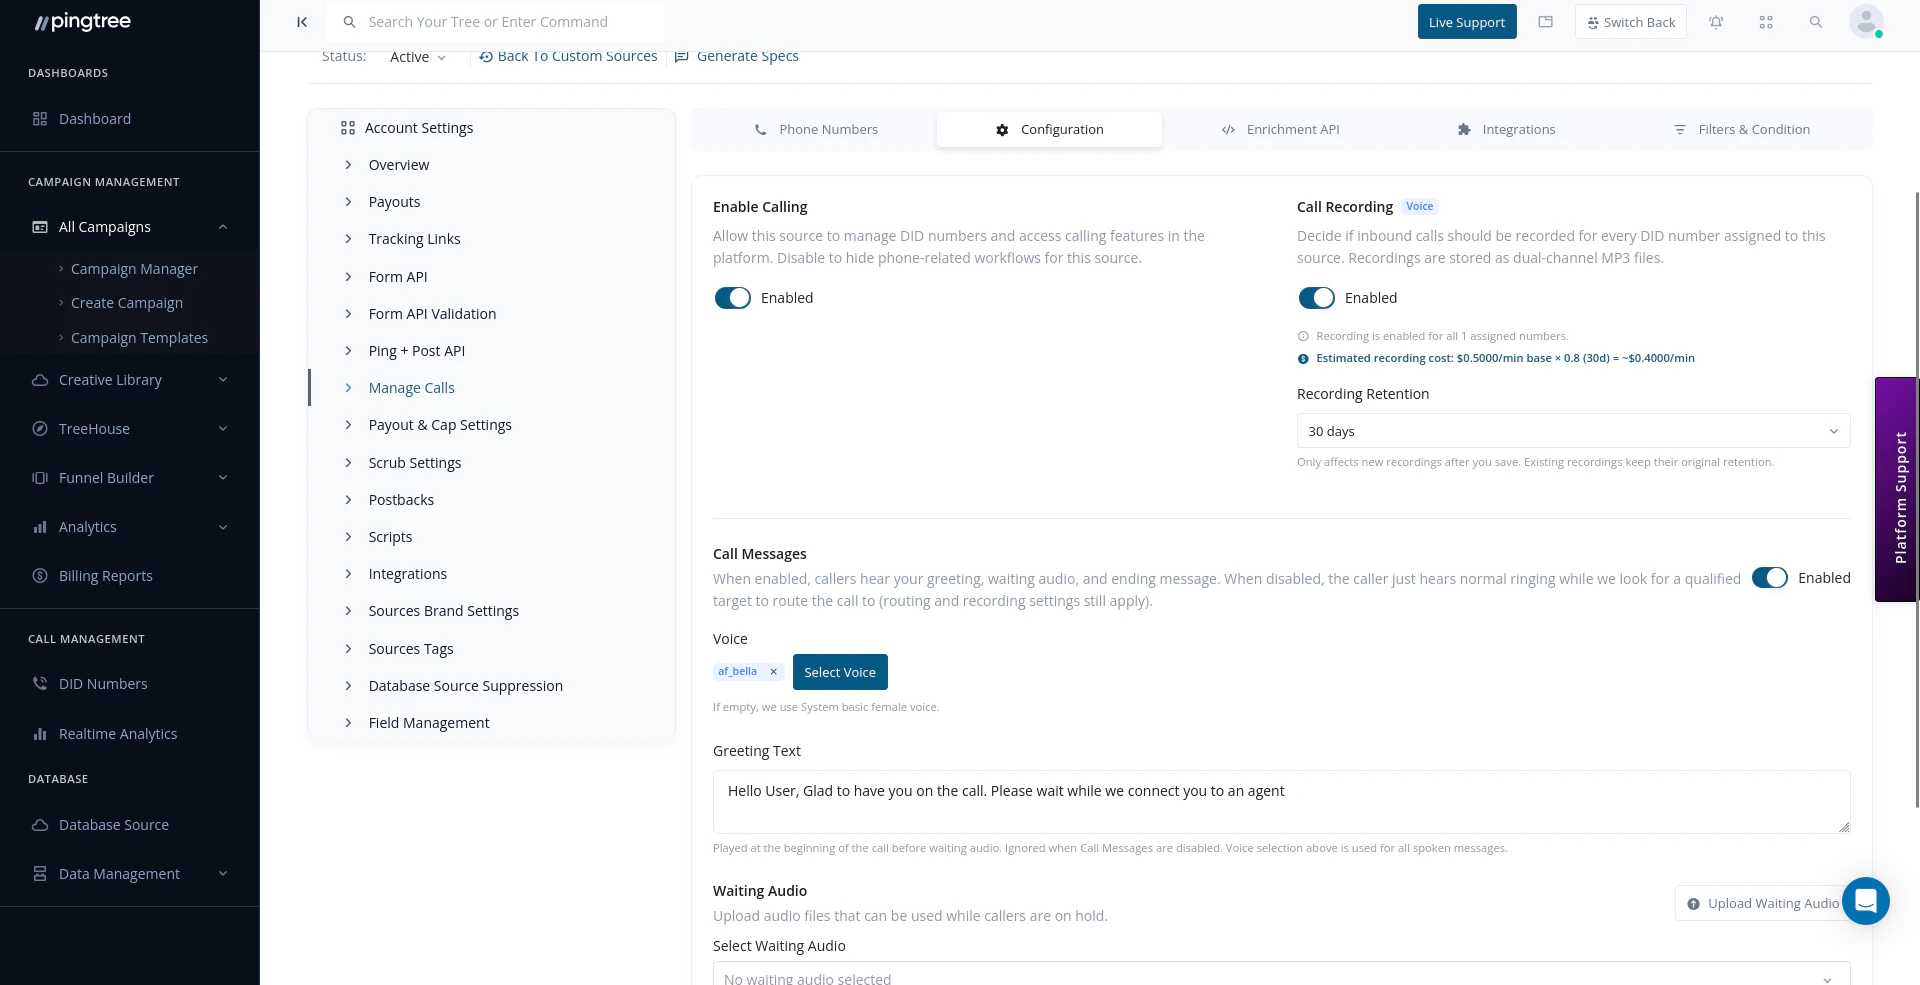
Configuration tab — enable calling, recording, TTS greeting, and hold audio
Accessing Call Settings
Call Settings are found inside the source detail view for any source that has a DID number assigned. Navigate to your campaign, open the source, and select the Manage Calls section in the left sidebar. From there, you’ll see five tabs:Phone Numbers
Assign and manage DID numbers for this source. Each source can have multiple numbers assigned.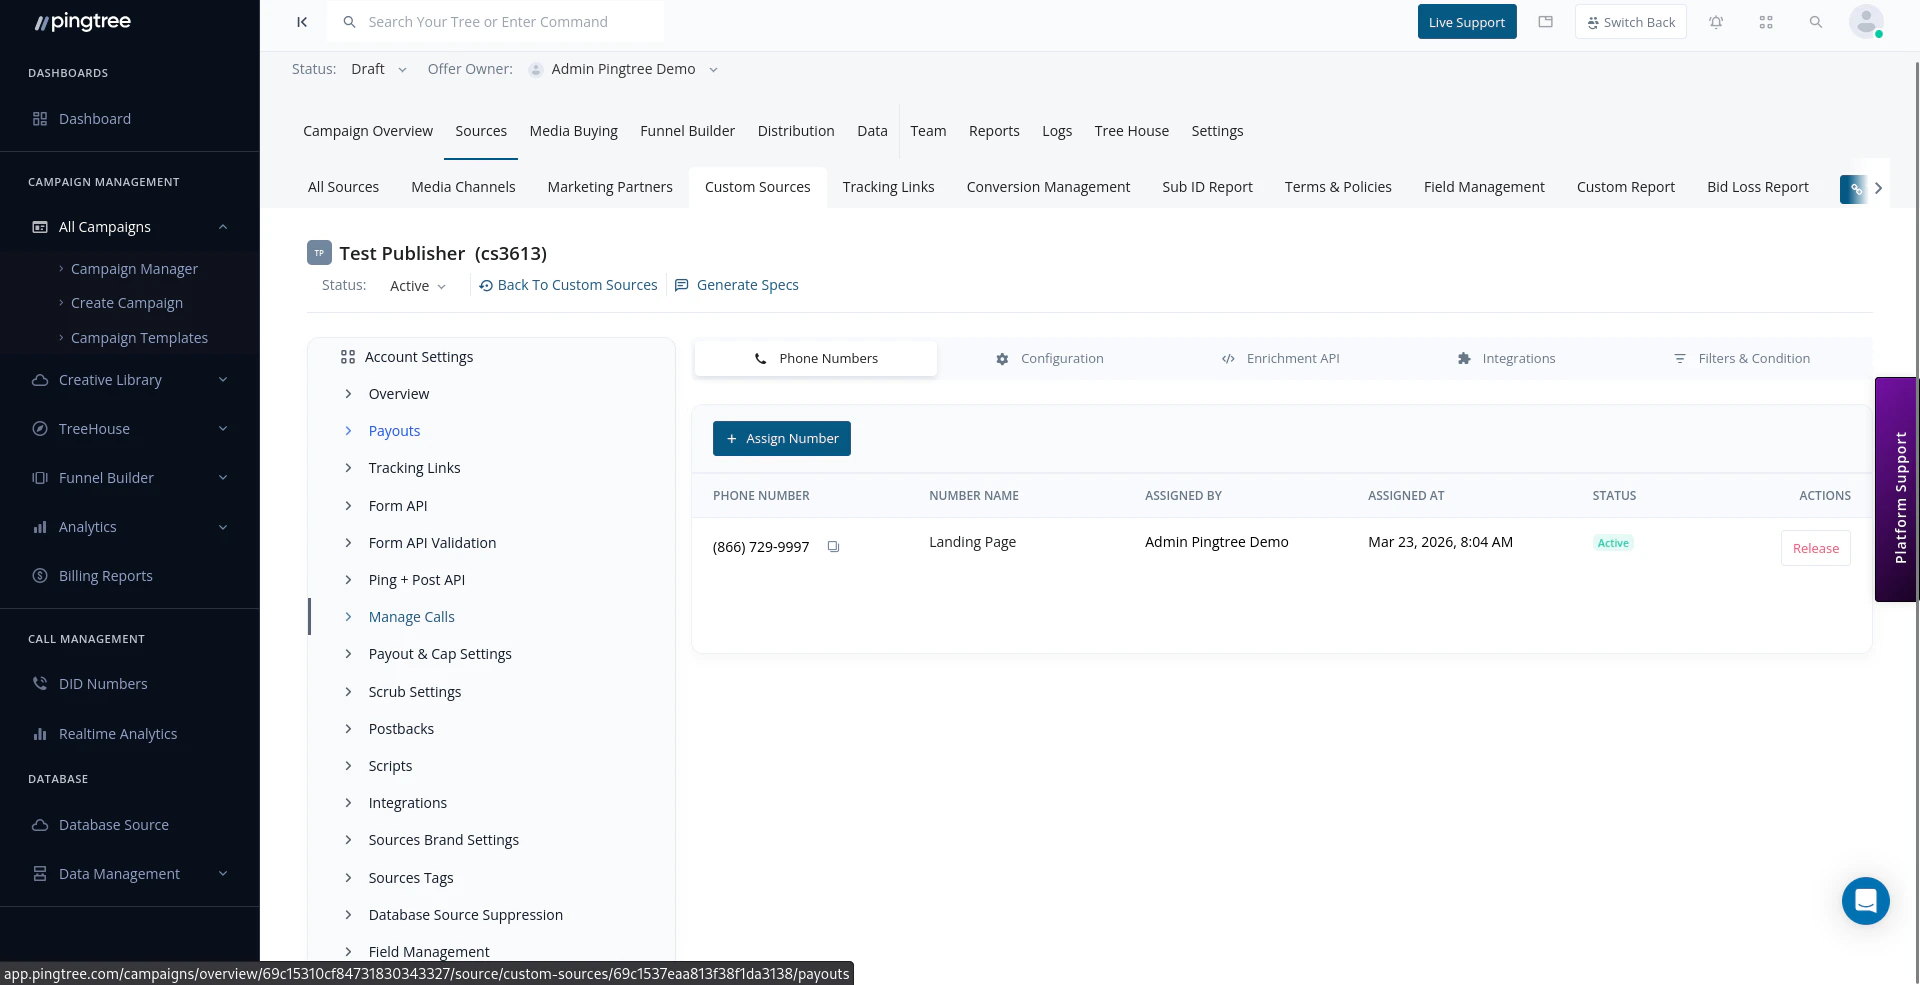
Phone Numbers tab — assign DID numbers to a source
Enrichment API
A dedicated API endpoint for enriching call lead data with additional fields. Includes authentication tokens and example requests.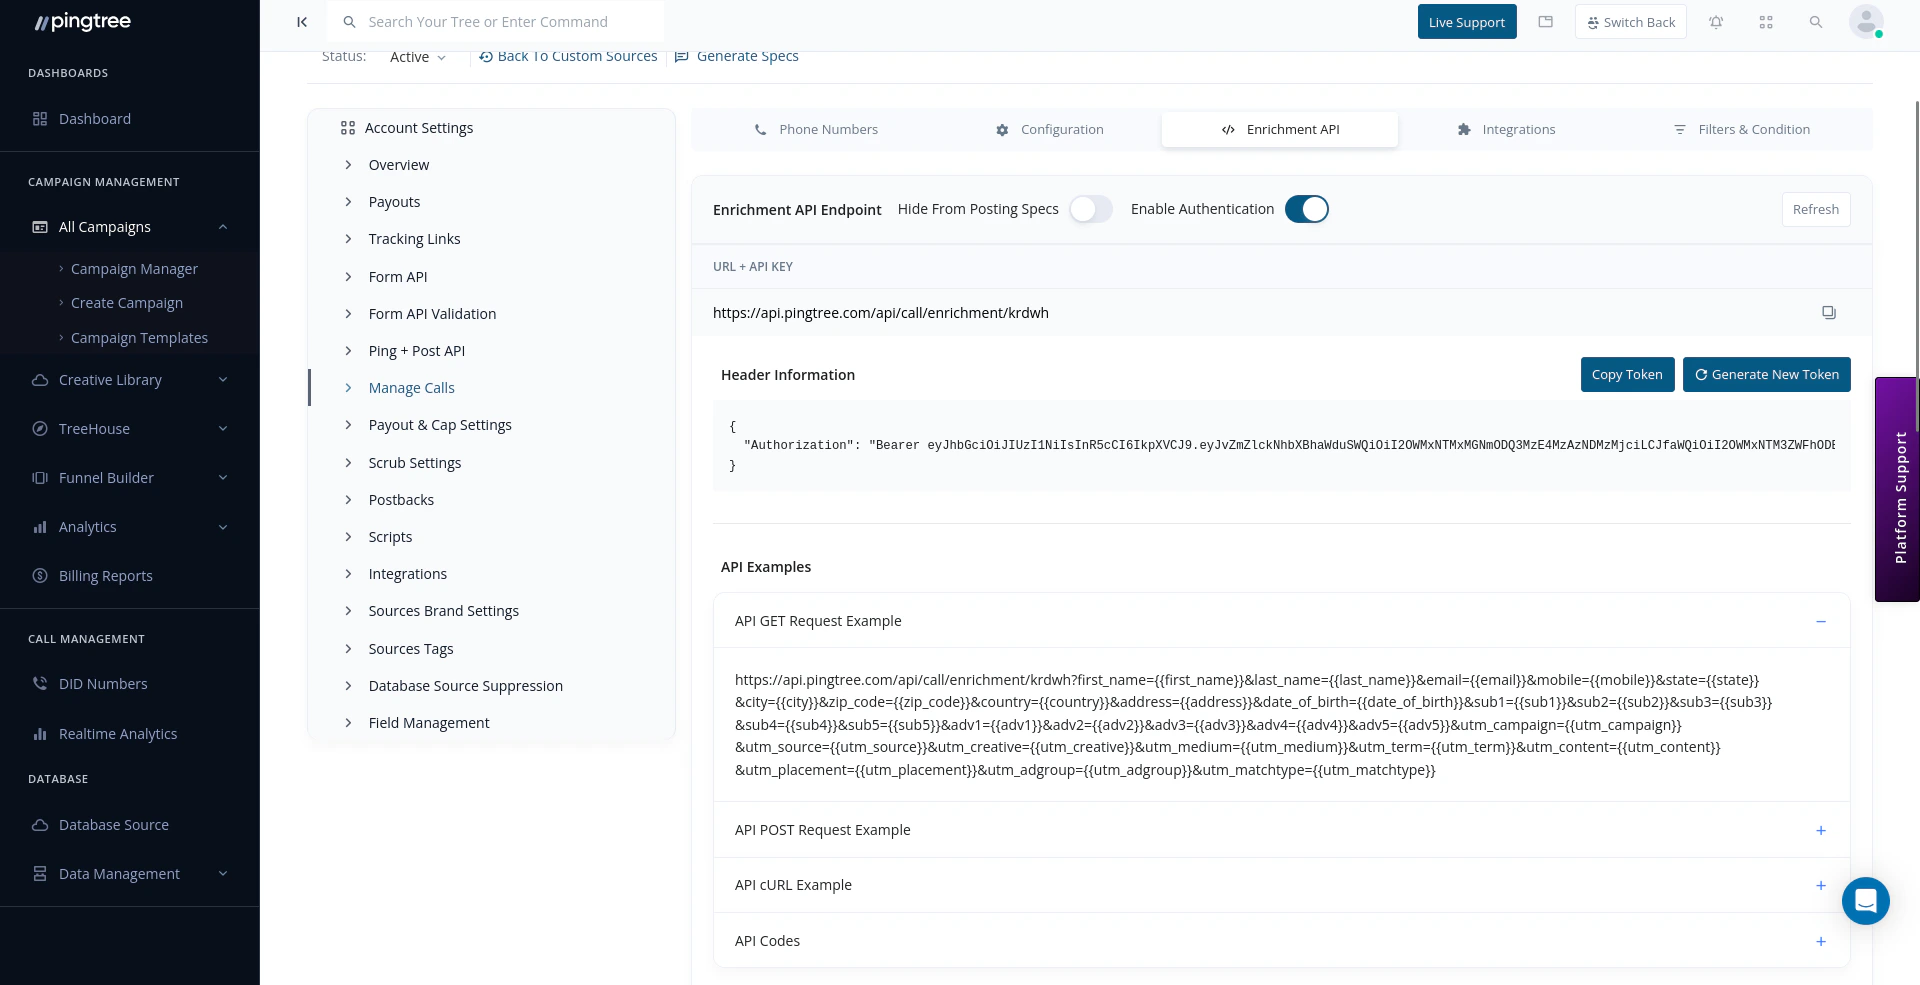
Enrichment API tab — call enrichment endpoint with token and API examples
Integrations
Enable or disable third-party validation services for call leads at the source level — including Blacklist Alliance (DNC checking), Debt Amount qualification, and Array credit pulls.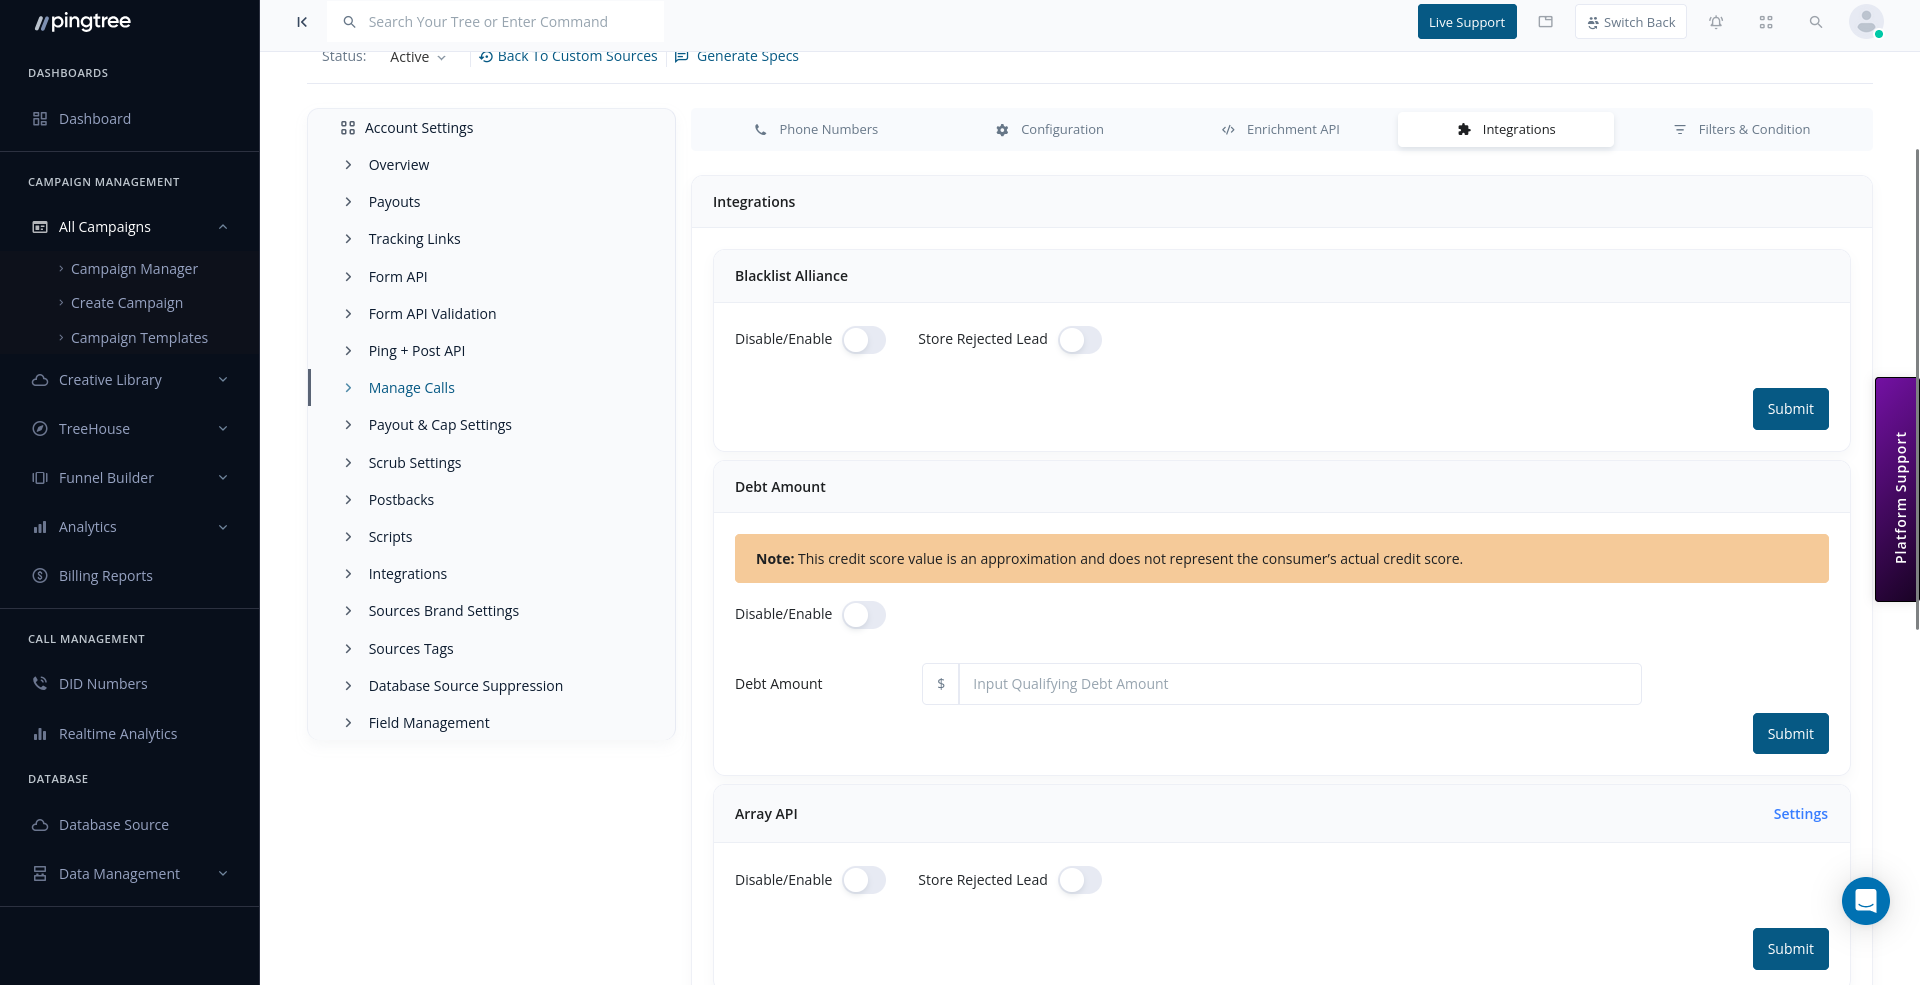
Integrations tab — Blacklist Alliance, Debt Amount, and Array API toggles
Filters & Conditions
Set call caps (global, monthly, weekly, daily, hourly), configure source operating hours by day of week, and define call filter rules based on conditions like state or area code.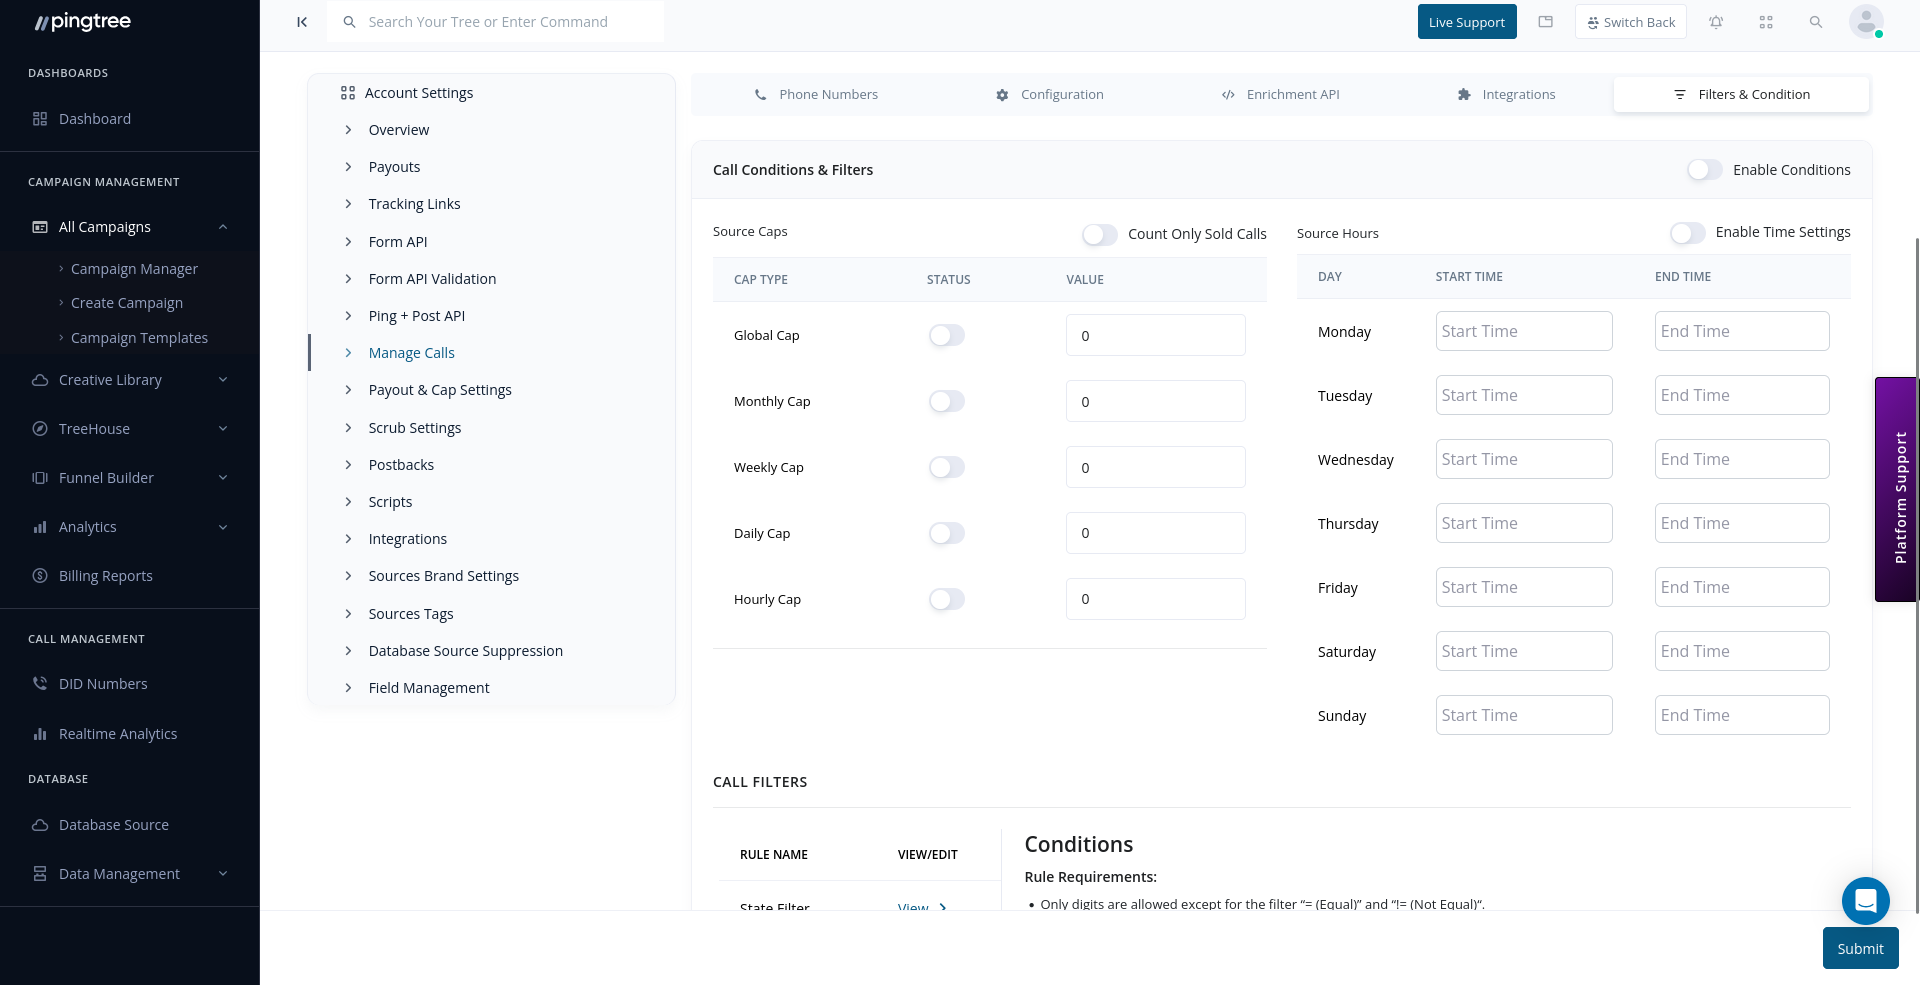
Filters & Condition tab — call caps, source hours, and call filter rules
Call Routing
Call routing determines which buyer receives each inbound call. Unlike source-level settings above, routing is configured at the campaign level under Distribution > Call Routing Logic.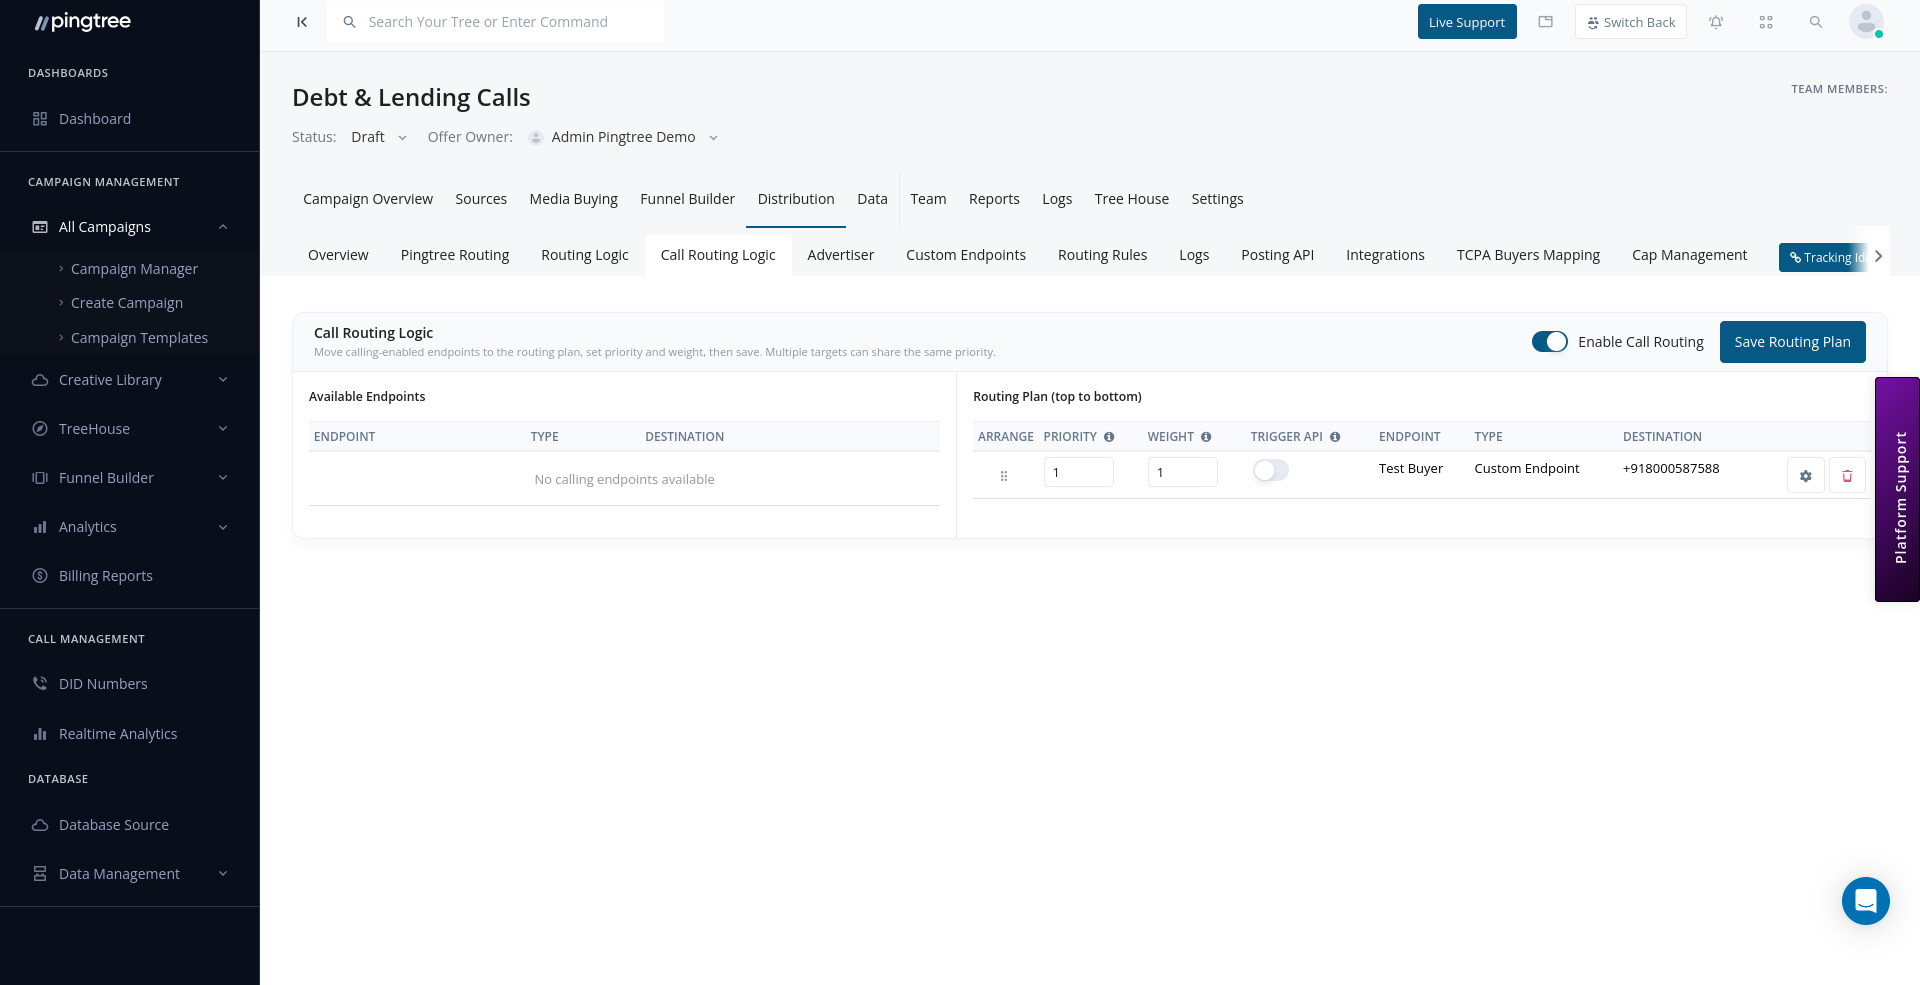
Call Routing Logic — set endpoint priority, weight, and routing order
How Call Routing Works
When an inbound call arrives on a DID number, Pingtree evaluates the routing plan from top to bottom:- Available Endpoints — the left panel shows all calling-enabled buyer endpoints in your campaign. Drag an endpoint into the Routing Plan to include it.
- Routing Plan — the right panel lists the active routing order. Calls are offered to endpoints starting from the top.
- Priority — endpoints with a lower priority number are tried first. Multiple endpoints can share the same priority level.
- Weight — when two or more endpoints share the same priority, weight determines how traffic is distributed between them. Higher weight means more calls.
- Trigger API — optionally enable a trigger that fires a postback when a call is routed to this endpoint.
Enabling Call Routing
Toggle Enable Call Routing at the top right of the page to activate the routing plan. When disabled, inbound calls will not be transferred to any buyer. After arranging your endpoints, click Save Routing Plan to apply changes. The new routing order takes effect immediately for all future calls.Tip: Use priority tiers to create fallback routing. For example, set your primary buyer at priority 1 and a backup buyer at priority 2 — if the primary doesn’t answer, the call automatically falls through to the backup.
Enabling Call Recording
Toggle Recording Enabled to capture inbound calls on that source. When recording is enabled:- All inbound calls on assigned DID numbers are recorded automatically.
- Recordings are captured in MP3 format with dual-channel audio — the caller and the connected buyer are recorded on separate tracks.
- A recording retention period must be set (see Recording Retention below).
- Toggling recording off disables capture for future calls but does not delete existing recordings.
Tip: Enabling recording on a source automatically applies the recording configuration to every DID number assigned to that source via Telnyx. No per-number setup is required.
Greeting Configuration
The greeting is the first message a caller hears when they dial your DID number. It is synthesized using Text-to-Speech (TTS) via Telnyx.Choosing a TTS Voice
Click Select Voice to open the voice browser. Voices are grouped by provider and language. Use the Preview button next to any voice to hear a short sample synthesized with your greeting text before committing to a selection.Tip: Write greeting text in natural spoken language. Avoid special characters, abbreviations, and URLs — TTS engines read these literally. For example, write “contact us at eight hundred five five five one two three four” rather than “call 1-800-555-1234”.
Ending Text
The ending message plays to the caller after the call transfer completes or before the call is disconnected.
Use the ending message to thank the caller, provide reference information, or set expectations for a callback.
Hold / Waiting Audio
Hold audio plays while Pingtree is routing the call to a buyer. You can select from uploaded audio files in your media library.- Open the Waiting Audio dropdown.
- Select an audio file from your organization’s media library.
- Save the settings.
Tip: Use hold music or a branded on-hold message to keep callers engaged while routing occurs. Silence during routing can cause callers to hang up.
Recording Retention
Recording retention controls how long call recordings are stored. Longer retention periods carry a higher cost multiplier on the per-minute recording charge.
The default retention when recording is first enabled is 30 days (0.80x). You can change this at any time; the new setting applies to recordings created after the change.
Tip: For compliance-sensitive verticals (insurance, financial services, healthcare), consider a 3-month or longer retention period. For general quality assurance, 30 days is a practical and cost-effective default.Recordings past their retention window are automatically deleted and marked accordingly in the call record.
Call Control Application
The Call Control Application is the Telnyx application that handles real-time call events for your organization. It is configured at the organization level and shared across all DID numbers. This field is read-only in the source Call Settings view. If the Call Control Application is not configured for your organization, number purchases and call routing will not work. Contact your account manager to have this set up.Testing a Phone Line
Before sending live traffic to a newly configured source, test the end-to-end call flow:- Ensure a DID number is assigned to the source and its status is Active.
- Call the DID number from a mobile phone.
- Verify the greeting message plays correctly.
- Confirm hold audio plays during routing.
- Check that the call connects to the expected buyer number.
- Review the call record in the campaign data tab to confirm the lead was created and attributed correctly.
Tip: Make a test call with recording enabled to verify that the recording is captured and accessible from the lead record before going live with a new source.