Note: This tab is available in Custom Source (CS), Marketing Partner (MP), and Media Channel (MC) source types.The Postbacks tab allows you to configure postback URLs for a specific source. Postbacks are a way to notify the source about user actions or campaign events, enabling deeper performance tracking and optimization.
What is a Postback?
A postback is a server-to-server communication triggered by user actions or lead events. It enables the exchange of information — such as lead status or conversion — between Pingtree and the traffic source’s own tracking system.How is a Source Postback Used in a Pingtree Campaign?
When a traffic source sends you leads, they may want feedback on those leads for two main reasons:- To track which leads generated revenue.
- To analyze lead performance quality for optimization.
What’s Required?
To configure a source postback, the source must provide the following:-
Postback URL
- The endpoint on their server where Pingtree will send the data.
-
Data and Field Mapping
- Only data captured with the lead can be dynamically sent.
- You must map Pingtree’s fields to the source’s expected field structure.
- You can also include static fields with predefined values.
-
Request Method
- Pingtree supports both GET and POST requests.
-
Payload Format
- Default: POST request in JSON format.
- Optional formats:
xml-8&xml-16x-www-form-urlencodedform-data
Postback Types
You must choose what type of postback to configure:Form Data Postback
- Trigger: Fired immediately upon lead distribution completion.
- Use Case: General data feedback, real-time tracking.
Event Data Postback
- Trigger: Fired when a specific Pingtree event occurs (e.g., lead sold, converted, rejected).
- Use Case: More controlled and conditional tracking (e.g., payout confirmation, conversion approval).
Test endpoint
- Use this button to test the connection and ensure the postback URL is properly set up. It will send a sample request and return the response, allowing you to confirm the endpoint is live and working.
Posting Filters
This is where you configure posting filters - rules that control when and which leads are allowed to be sent through the postback to the specified partner or endpoint. Filters include ZIP code, state, and volume/time restrictions.ZIP Code Filters

Exclude ZIP Code
-
Exclude Zipcode Toggle:
When enabled, Pingtree will prevent the postback from firing for any lead with a ZIP code matching the ones entered. -
ZIP Code Input Field:
Input one or more 5-digit ZIP codes.
- Must contain only numbers
- Must be exactly 5 digits
Tip: Use this to block leads from specific ZIP codes based on partner targeting preferences.
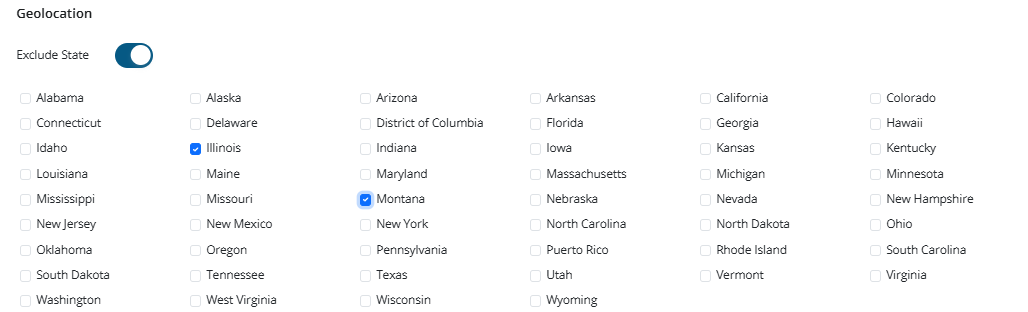
Geolocation Filter (Exclude State)
-
Exclude State Toggle:
When turned on, Pingtree will prevent postback triggers for leads from selected states. -
Use Case:
Useful when a buyer or partner does not accept traffic from certain U.S. states for legal or performance reasons.
Tip: You can select multiple states simultaneously.
Caps
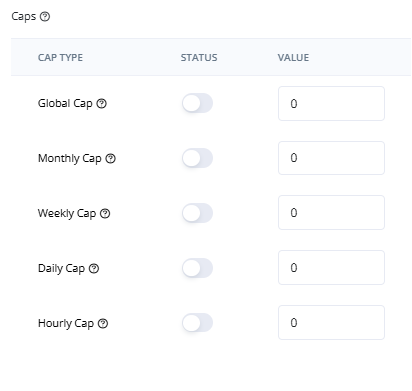
- A toggle to enable
- A numeric input to define the cap limit
Cap Types
Note: Once a cap is reached, leads will still be accepted or sold, but postbacks will not fire until the timeframe resets.
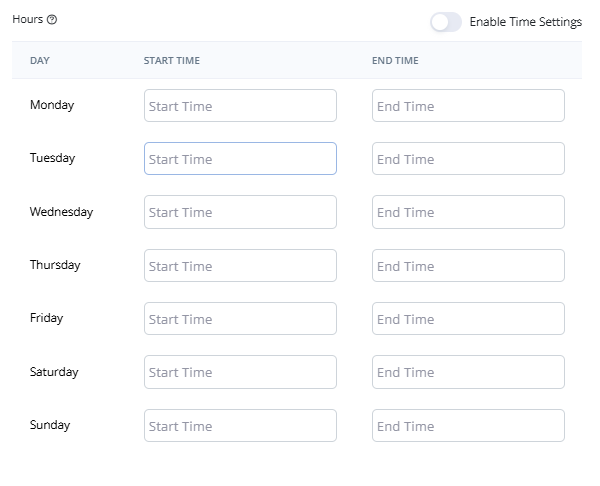
Hours
-
Enable Time Settings Toggle:
Activates the scheduling UI. -
Time Window Setup:
For each day of the week, define:- Start Time (Earliest firing time)
- End Time (Latest firing time)
Example: If the partner only wants postbacks from 9 AM–6 PM, set those hours for Monday–Friday.
Tip: This does not block leads outside of these hours—only the postback.
Conditions
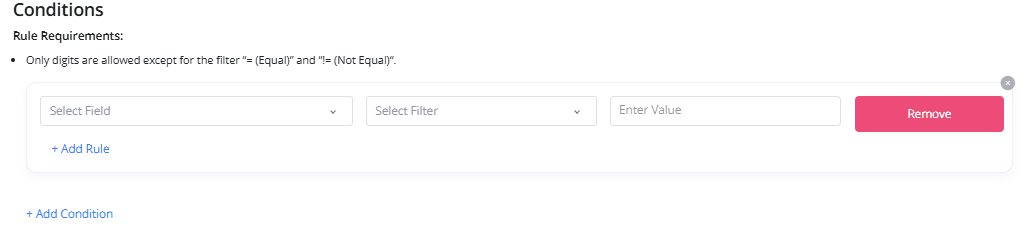
Each Condition Includes:
- Field Selector: Choose a field like
state,zip_code,payout,lead_status, etc. - Filter Operator:
=(Equals)!=(Not Equal)<(Less Than)>(Greater Than)
- Value Input: Enter the value to compare.
Advanced Options:
- + Add Rule: Add multiple rules to the same condition group (evaluated with AND logic).
- + Add Condition: Add new groups of conditions (each group is evaluated independently).
Examples:
- Fire postback only if payout > 10
- Fire postback only if lead_status != rejected